|
Orkney played a vital role in both World Wars and the vast number of wartime structures that litter the landscape are testament to this fact. Its importance was mainly thanks to a body of water named Scapa Flow, a sheltered natural harbour surrounded by many of the Orkney Islands. It is also ideally situated for guarding the North Sea and these factors contributed to Scapa Flow being chosen as the main base for the Royal Navy fleet during both World Wars. The protection of the fleet was a priority and this led to numerous coastal defences and batteries being built on the islands, some of which I recently visited on the wartime themed itinerary detailed below.
Unfortunately there were many local wartime casualties, including a combined total of over 1600 lives lost from attacks on HMS Hampshire and HMS Pheasant during the First World War, and HMS Royal Oak during the Second World War. A tragic accident on board HMS Vanguard during the First World War also resulted in over 800 lives lost and the death of the first civilian through enemy action during the Second World War also took place on Orkney when James Isbister was killed in Stenness. When I first visited Orkney I wasn't fully aware of how much the present day island life had been shaped by this dark period. After following this 1 day itinerary I felt a greater appreciation of the local impact and legacy left by this significant era of history. Tales of horror, hope and human spirit were intertwined in all the places that I visited.
ABOUT THE ITINERARY AND MY ADVICE
The itinerary is one of several autumn and spring themed day trip ideas that are being introduced by Destination Orkney over the coming months as part of their 'See You at The Weekend' campaign. I'll be trying them all out so stay tuned for lots more Orkney inspiration from me.
If you intend on following the full Wartime itinerary then I would advise some advance planning as you will need to take in to consideration opening times and book a place on the Ness Battery Tour. Due to these variables it is unlikely that your route will be exactly the same order as mine. The day is quite intense as there is a lot to do and see but if you're short on time and want to visit all the attractions mentioned then it is doable, just be prepared for a full day out. Alternatively, you can select a few sites to visit and take your day a bit easier or if you have more time, spread the itinerary out over a couple of days and enjoy it at a more relaxed pace. I've included a list of the locations below, with a map at the bottom of the page. I've also provided the approximate minimum time needed to visit (although you could spend much longer at most sites) and some helpful tips at the bottom of each attraction to make your planning as easy as possible - don't say I'm not good to you...
ORKNEY WARTIME ITINERARY LOCATIONS
STOP 1
Churchill Barriers
TIME REQUIRED - 5 MINUTES
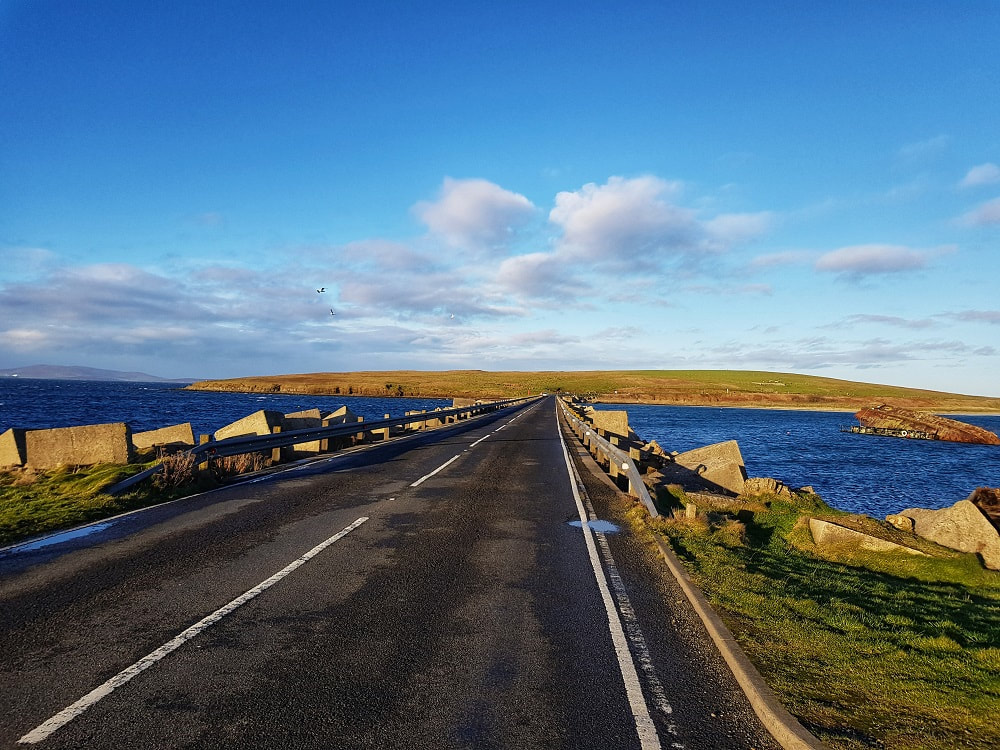
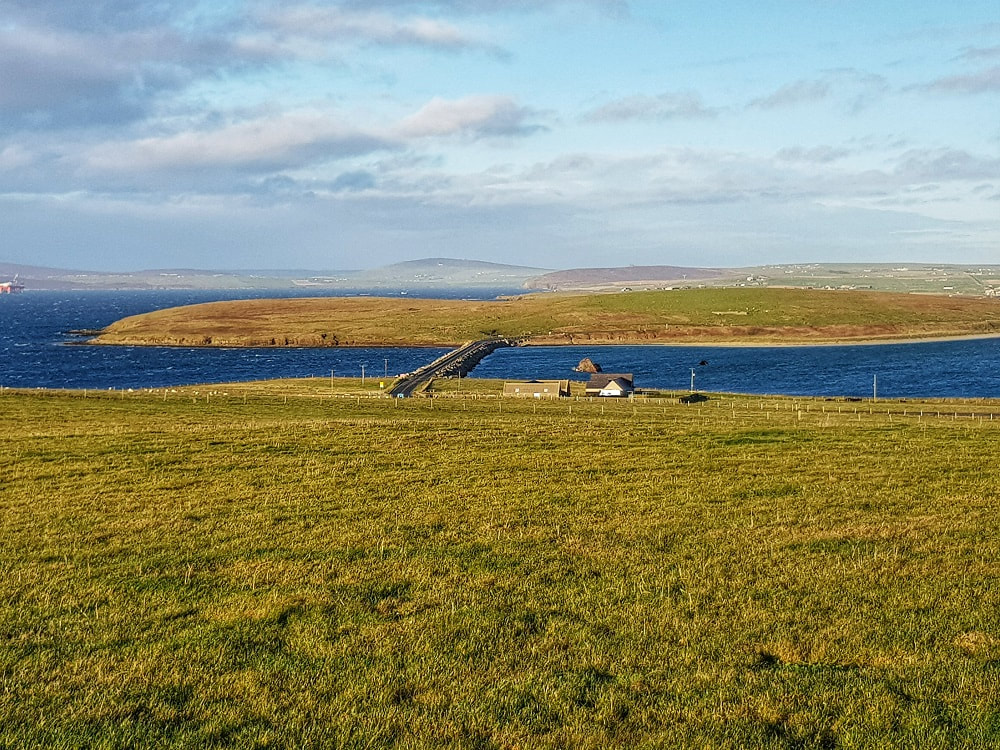
The Churchill Barriers are a series of 4 causeways that link the 5 islands of Orkney Mainland, Lamb Holm, Glimps Holm, Burray and South Ronaldsay. Today most people view them as a convenient transport connection and they have certainly opened up local work and tourism opportunities. Indeed, it is the presence of the barriers that allowed me to travel between the various islands on my 1 day itinerary with ease, yet they are probably the most significant wartime legacy on Orkney.
You just have to look beyond the barriers to the rusting remains of ships rising out the water to be reminded of the reason these causeways first came about. These ships are blockships, deliberately sunk to block the passages between the islands. Along with submarine nets they formed naval defences designed to stop German U-boats. However, on 14th October 1939, German U-Boat U-47 managed to pass the blockships at high tide and torpedo HMS Royal Oak which was moored in Scapa Flow. The battleship sank quickly, with the loss of over 800 lives.
Winston Churchill proceeded to visit Orkney and instructed the building of 4 permanent barriers. The project was a great feat of engineering as the deep water and tidal currents caused logistical problems. A shortage of labour force resulted in many Italian prisoners of war being brought to Orkney. Quarries and infrastructure including rail links and piers also had to be created.
Below the smooth tarmacadam surface that exists today, is a massive hidden layer of rocks and concrete. In fact, 250,000 tons of broken rock set in wire cages and 66,000 cast concrete blocks were used to build the barricades. The work began in May 1940 and was completed in September 1944. Today, two of the barriers have been listed by Historic Environment Scotland as structures of national importance and a powerful reminder of Orkney's wartime past.
TIPS FOR VISITING
Hoxa Head
TIME REQUIRED - MINIMUM 45 MINUTES ALTHOUGH YOU COULD SPEND MUCH LONGER
My first proper stop of the morning was on the island of South Ronaldsay, easily reached from Mainland thanks to the previously mentioned Churchill Barriers. On the west coast of the island, Hoxa Head overlooks the The Sound of Hoxa, one of the main approaches to Scapa Flow.
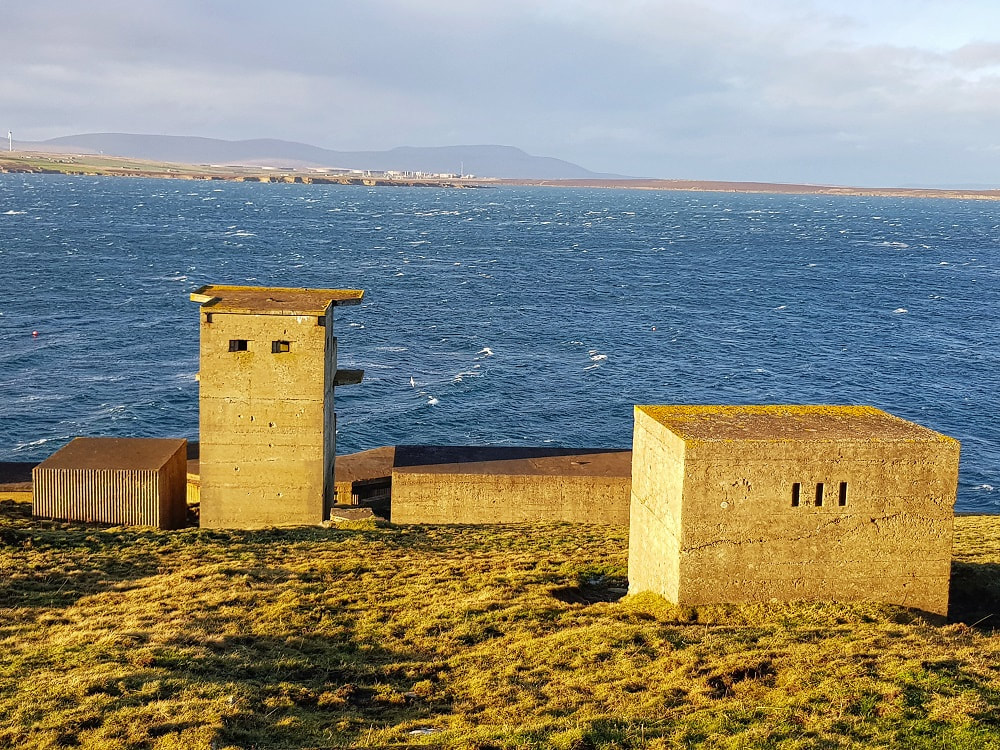
Extensive coastal batteries were built on the surrounding islands of Flotta and South Ronaldsay to defend this strategic Orkney location and it is here that the substantial ruins of clifftop batteries that were operational during both world wars can still be found. Coastal defences are a common feature on Orkney but those at Hoxa Head are among the best ones to visit as there is still an extensive amount of structures remaining with evidence of gun emplacements, observation towers, an accommodation camp and more. I should add that many of the buildings are in a dangerous condition, with some partially collapsed so it is not recommended or advisable to explore inside.
The complex of batteries extends over 700m around the headland and has been listed as a Scheduled Monument. A battery was first installed here during the First World War which included gun and searchlight emplacements, engine room, shelters, accommodation and observation posts. At the end of WW1 the battery was decommissioned and the guns sold for scrap, I'm sure in the thinking that they wouldn't be needed so soon after!
With the arrival of another World War, the defences had to be rebuilt, and a second gun battery known as Balfour Battery was constructed and the whole site extended. Mothballed in 1943, the site was finally abandoned by 1950. I for one hope we never need defences like this again.
TIPS FOR VISITING
STOP 3
Italian Chapel
TIME REQUIRED - 10 - 20 MINUTES
The Italian Chapel is a building I don't think I'll ever tire of visiting. I've been several times now and have noticed something new on each occasion. There is a reason it is one of Orkney's most popular attractions drawing over 100,000 visitors each year.
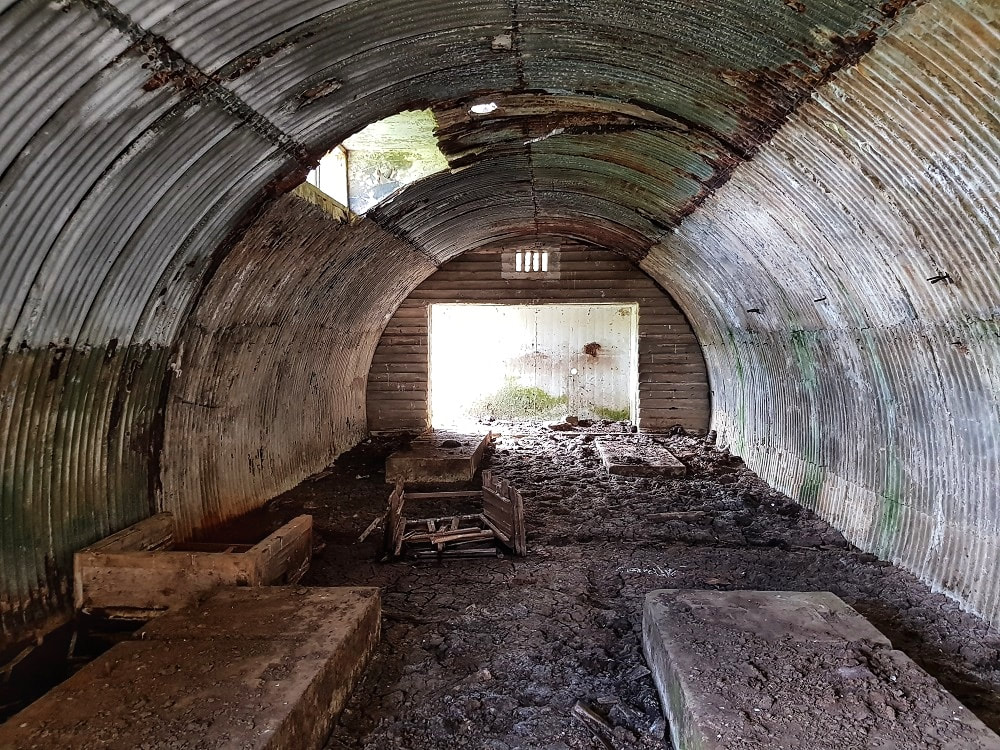
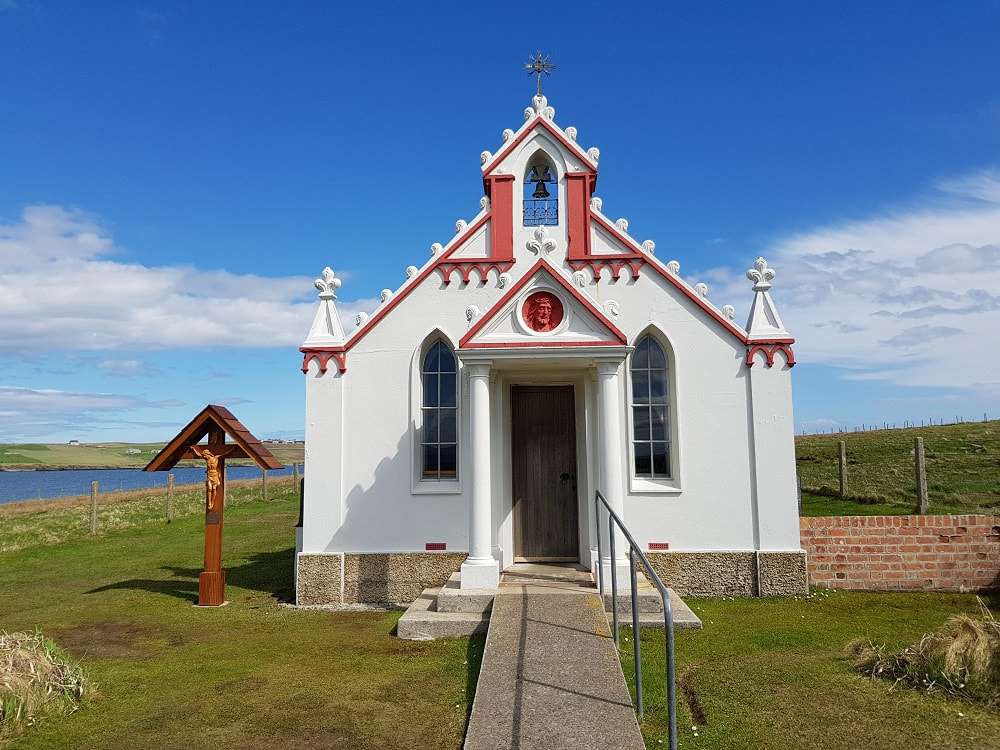
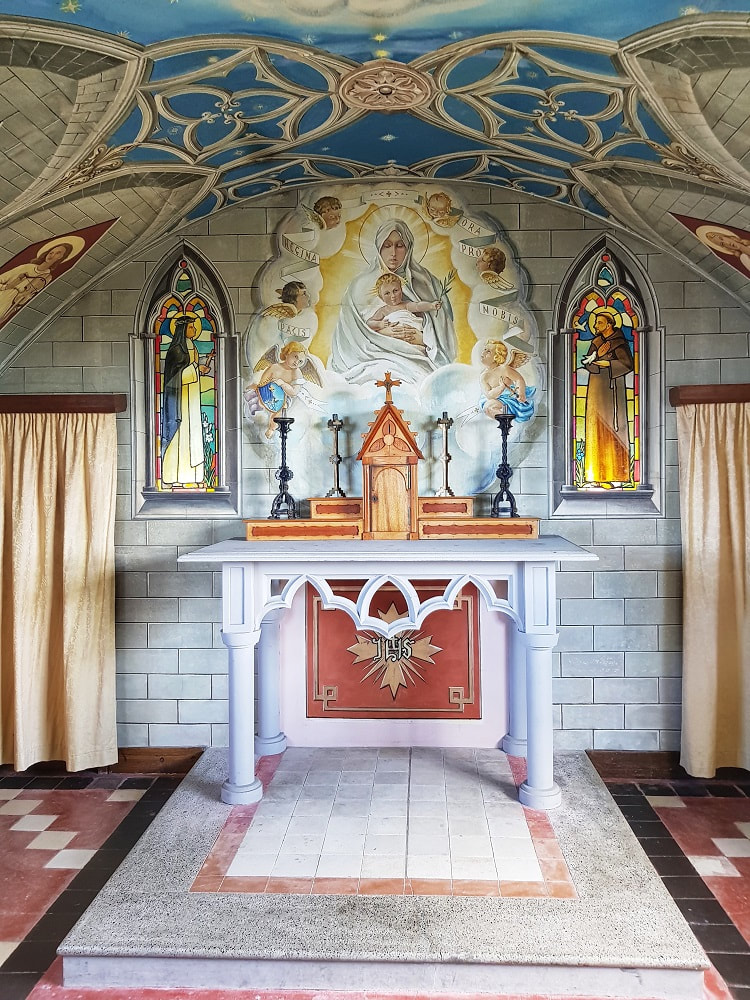
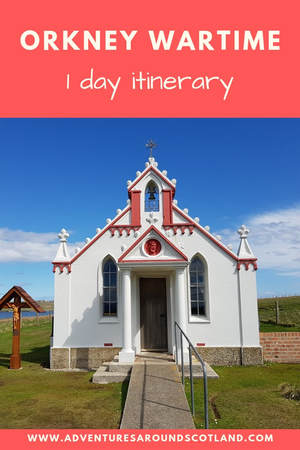
Essentially the Chapel is constructed from two Nissen huts which have been transformed in to a small but beautifully formed sanctuary. The building came about after a request from Italian prisoners of war who were captured in North Africa and brought to Orkney to assist with the building of the Churchill Barriers. Many of them were based at Camp 60 on the island of Lamb Holm and wanted their own place of worship. The request for a chapel was agreed and the prisoners undertook the construction work and interior decoration during their spare time. One of the prisoners, Domenico Chiocchetti, was an artist and he was responsible for a large part of the design. He was assisted by Giuseppe Palumbi, a blacksmith, and Domenico Buttapasta, a cement worker, among many others. The Italian Chapel is stunning and a testament to their devotion and talent. It is hard to believe all the intricate detail was mainly fashioned from scrap material, concrete and some bought items from the prisoners welfare fund.
After the interior was completed, the prisoners started work on the exterior. Standing before the ornate white facade, there is little evidence that the building actually consists of two very plain Nissen huts. Head around the side and the back of the chapel to fully appreciate what basic shelters they were working with.
The Italian Chapel was actually only in use for a short period and has been restored and preserved over the years since which I for one am glad of as not many beautiful things rise out of the horror of war.
TIPS FOR VISITING
Looking for more Orkney inspiration?
You might also enjoy myOrkney Viking - 1 Day Itinerary
STOP 4
Kitchener Memorial
TIME REQUIRED - MINIMUM 45 MINUTES , LONGER TO WALK ALONG THE CLIFFS
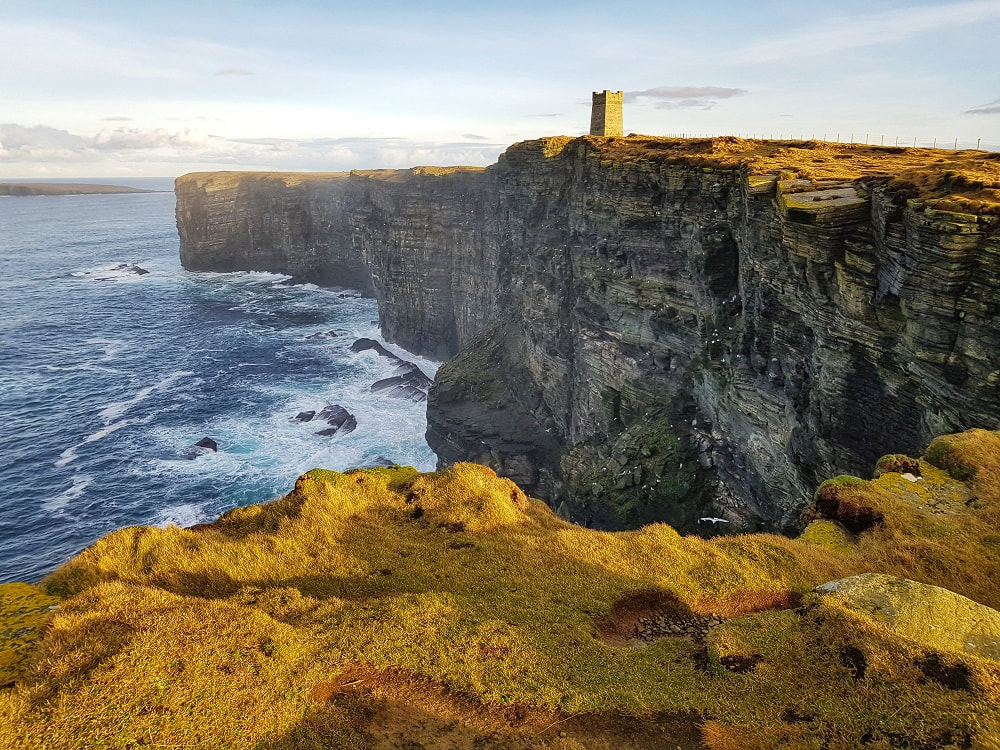
My next stop saw me head north to the dramatic cliffs at Marwick Head to visit a memorial to Lord Kitchener. Even if you haven't heard his name before, you will likely know his face from the iconic recruitment posters created during the First World War which encouraged Britons to sign up to the army.
At the outbreak of the war, the Prime Minister at the time, Herbert Henry Asquith, appointed Kitchener as Secretary of War due to his considerable military experience. In 1916 he was appointed to HMS Hampshire on a diplomatic mission to Russia to persuade the Tsar to boost Russia's efforts in the conflict. On the 5th June HMS Hampshire set off from Scapa Flow and a short time later she struck a mine off the Orkney coast. There were only 12 survivors, with over 700 lives lost including Lord Kitchener, although his body was never recovered. Well that is the official version of events anyway, a number of conspiracy theories surround some of the mysterious events that took place that night. I won't go into them here but they do make for some fascinating reading if you look them up and they might make you wonder about the true circumstances of the sinking of HMS Hampshire.
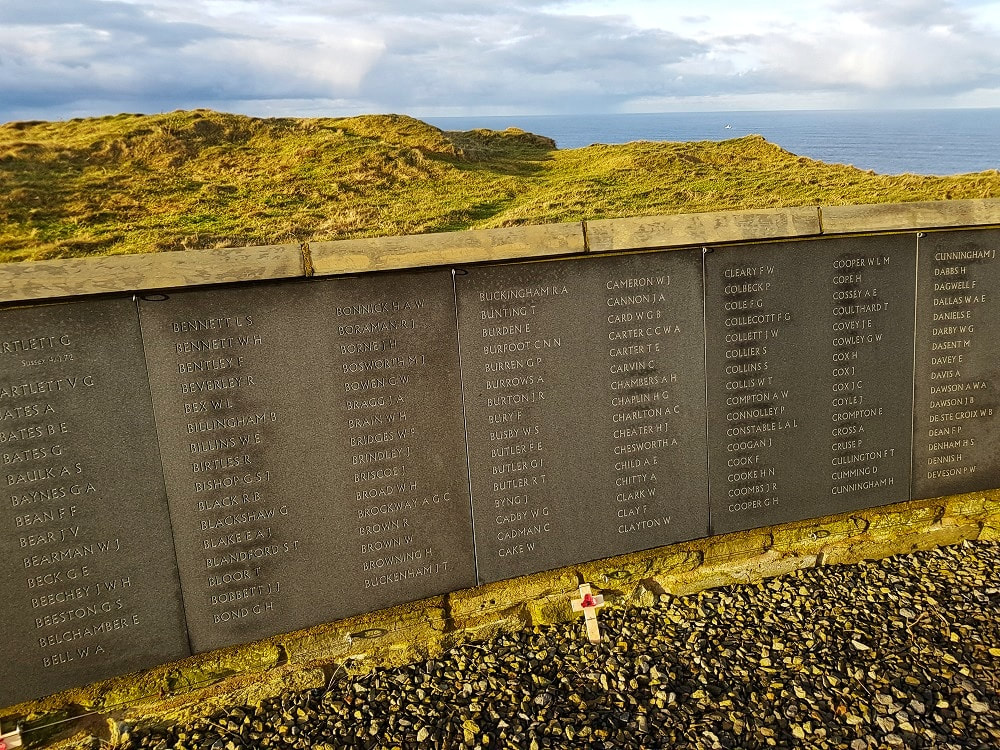
What isn't in dispute is that many lives were lost in the tragedy and less than 2 miles from the spot the ship went down is a monument to the event. The Kitchener Memorial is a 48 ft high stone tower, built by public subscription and unveiled in 1926. In 2016 an arc-shaped commemorative wall was added to the site featuring the names of all 737 men that died on HMS Hampshire.
The memorial sits within the RSPB reserve at Marwick Head which is a worthwhile destination in its own right. I enjoyed meandering along part of the coastal path which offers dramatic cliff scenery and views out to the Atlantic Ocean. However, reading the details of yet another significant wartime loss of life on the shores of these beautiful islands did add some heavy contemplation to my walk.
TIPS FOR VISITING
STOP 5
Ness Battery
TIME REQUIRED - 75 MINUTES FOR THE TOUR
Ness Battery can only be accessed on an arranged tour, so I had contacted my guide Andrew Hollinrake in advance and met him at the entrance to what is regarded as one of Britain's best-preserved wartime sites. Andrew is an archaeologist and military historian who was part of the team that carried out historical research and an archaeological survey of the site, in other words he knows his stuff!
I quickly learned that the battery has been reinvented several times over the years which partly explains why it is in a better condition than most. It is positioned in another strategic location guarding Hoy Sound and the western approach to Scapa Flow. Three gun batteries were first built along this coastal stretch during the First World War, originally named Hoy Nos 1- 3. During the Second World War, Ness Battery was built and extended in phases to include gun emplacements, stores, an engine room, observation post and accommodation camp. It remained operational until 1948 and soon after became a training site for the Regular and Territorial Armies before it was sold off by the Ministry of Defence in 2001. In the 1970s a helipad was also built in Ness Battery by the Northern Lighthouse Board who used it to transfer personnel and supplies to lighthouses in the north of Scotland.
In 2009, research, restoration and stabilisation took place at Ness Battery to preserve the site and allow it to be opened up to the public for tours. Steel supports have been added to make some of the structures safe and 1970s asbestos roofs on the huts replaced with materials more in keeping with the original construction. Additional work is planned so more of the buildings can be opened up in the future.
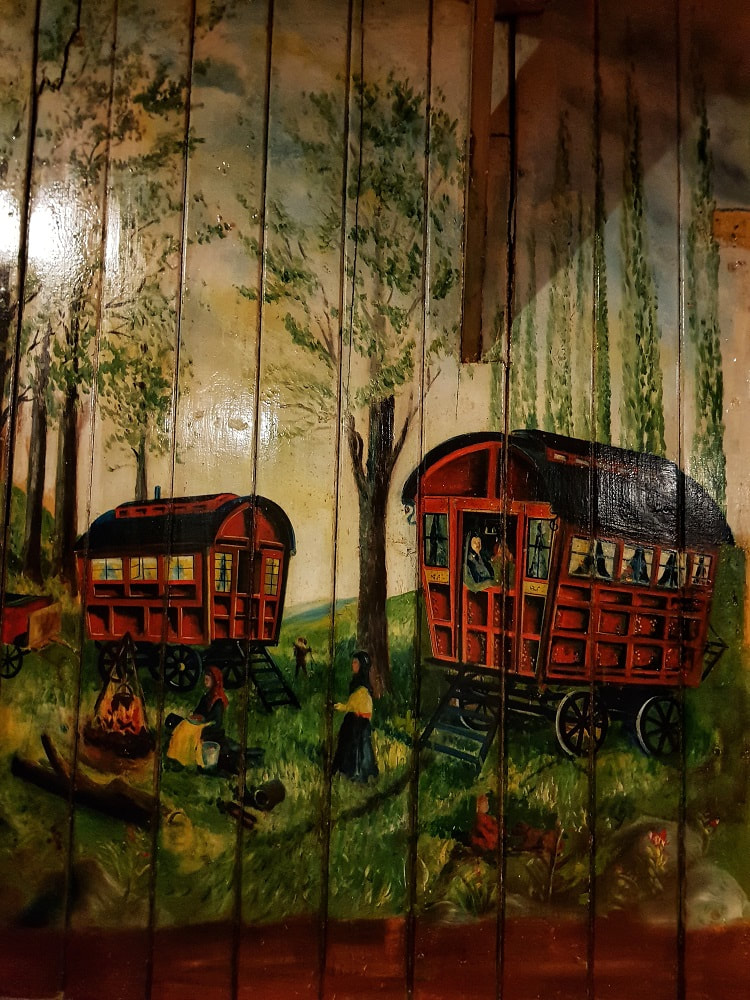
As Andrew walked me around he described the different functions of the various structures which really helped me to understand what life was like for those stationed at the various coastal batteries around Orkney. One of the highlights of Ness Battery is a visit to the original wooden accommodation huts and in particular the Mess Hall, which is famous for its mysterious mural. The painting covers 3 walls and depicts rural England. It is signed by AR Woods and some investigation has established that the artist was likely to be Albert Rycroft Woods, a pier master for the London Port Authority. Although it is unknown why he was in Orkney and the purpose of the painting. There are many abandoned batteries on Orkney, including Hoxa Head where I had started my day, however Ness Battery is the best one to visit if you want a real sense of what life was like when they were in use.
TIPS FOR VISITING
STOP 6
Stromness Museum
TIME REQUIRED - MINIMUM 20 MINUTES FOR A TASTER BUT ALLOW AT LEAST 1 HOUR TO DO IT JUSTICE
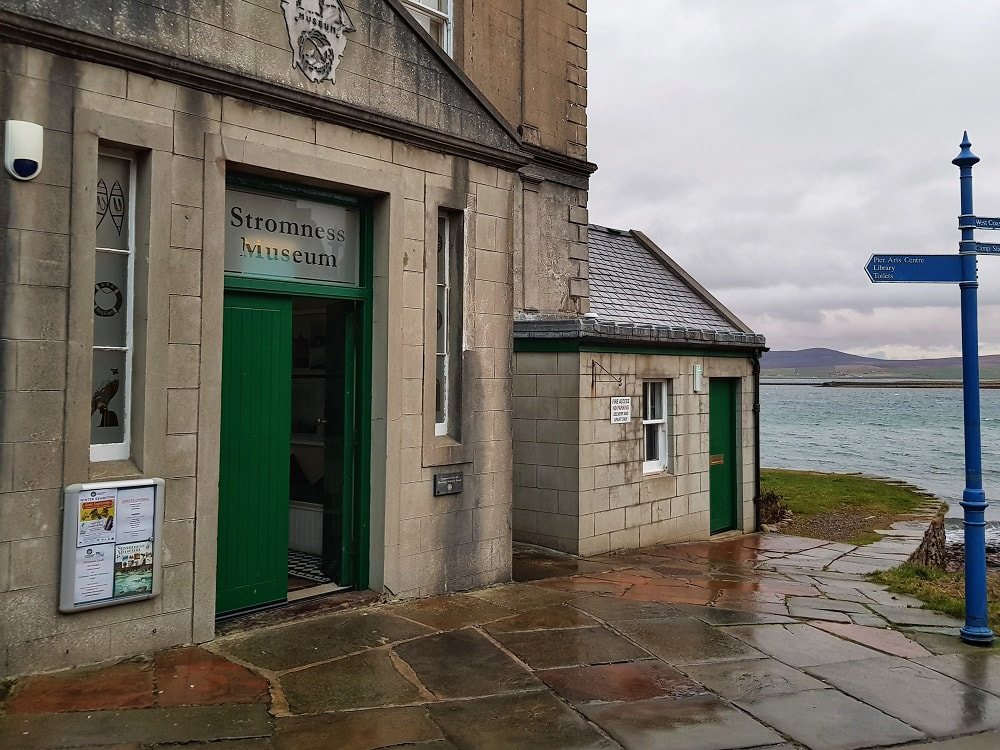
I ended my day in Stromness and enjoyed my first trip to Stromness Museum, I actually can't believe its taken me this long to visit! There is a great mix of exhibits and I was a bit worried it might be too similar to Orkney Museum in Kirkwall but it actually feels completely different.
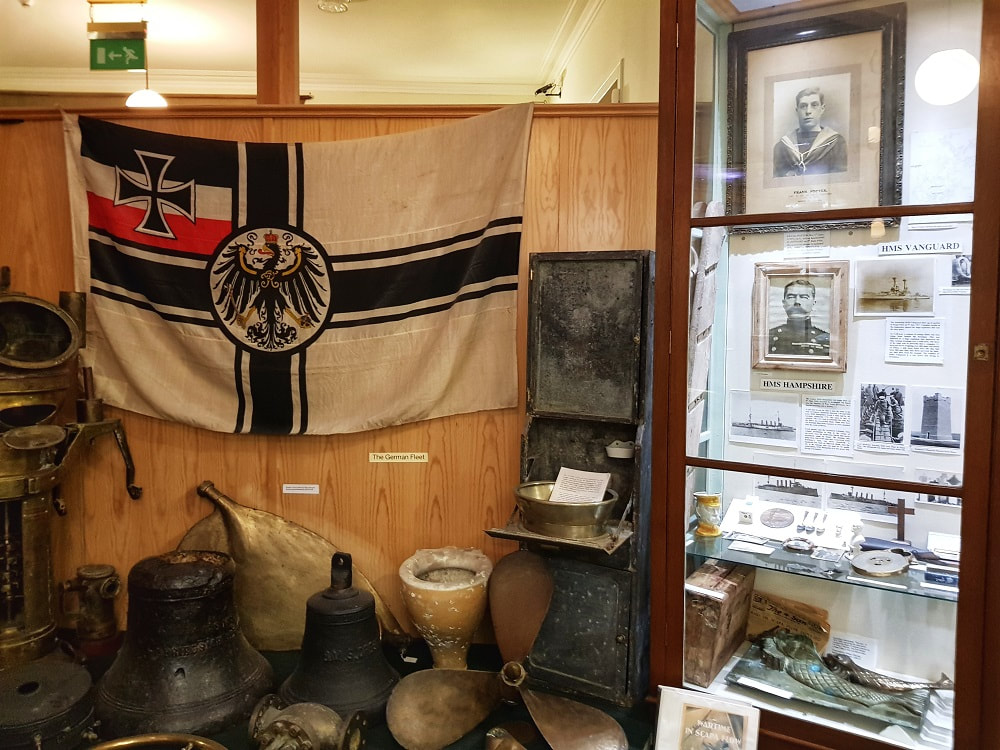
Maritime, Natural History, Ness of Brodgar finds and Canadian connections are among some of the main themed exhibits. Unfortunately on this occasion I didn't have as much time to explore as I would like so I'll definitely be returning for a better look around. My main focus was the wartime display and many of the items had a link to the stories that I had been learning about throughout the day. There are also quite a few objects from the German fleet which was confined in Scapa Flow as part of the Armistice conditions after the First World War. In the fear that Germany would be made to hand over its ships, the commanding officer Rear Admiral Ludwig von Reuter ordered for them to be scuttled. Many items were recovered from the fleet, including a flag, lifebelt and even candlesticks which are now on display in the museum.
This seemed a fitting place to finish my Orkney Wartime itinerary as it helped bring the history to life. Throughout the day I experienced a range of emotions and learned so much about the important role Orkney played throughout two of the darkest times in our recent history. It is another significant era that has helped shape the Orkney of today and one that should be acknowledged during any visit.
TIPS FOR VISITING
MY MAP OF ALL THE LOCATIONS MENTIONED
Disclaimer - This blog post is part of a sponsored partnership with Destination Orkney to promote their weekend itineraries, however as always all experiences and opinions are based on my personal experience
PIN IT FOR LATER!
Comments are closed.
|
Follow my Scotland travel adventures on social media
If you have found my blog useful and would like to support me in creating future Scottish travel content, you can by me a coffee on my Ko-fi page. All 'coffee' donations are hugely appreciated
|
NEED SOME HELP PLANNING YOUR TRIP TO SCOTLAND? BOOK A ONE-TO-ONE VIDEO CONSULTATION
FOLLOW MY ADVENTURES AROUND SCOTLAND ON
|
If you have found my blog helpful or inspiring, you can support me in creating future Scottish travel content for the price of a coffee at my Ko-fi page. All 'coffee' donations are hugely appreciated and all funds will go towards covering the running costs of my website and the occasional caffeine fix! |


 RSS Feed
